Dropbox is best known as a cloud storage service, but it also offers some collaboration tools. For example, you and your co-workers can add comments to files and create shared to-do lists. These functions are available with all Dropbox individual user plans (including both free and paid versions) and team accounts for business.
This guide walks you through these collaboration tools when you use Dropbox through a web browser. The Dropbox mobile apps for Android and iOS offer similar features (in a different format to accommodate smaller screens), but the Dropbox desktop apps for macOS and Windows do not offer as many sharing and collaboration options as the web interface.
To collaborate with other people in Dropbox, you have to first share a file or folder that you want to work on with them. Sharing a folder also shares all the files inside it.
There are a few different ways to share a file or folder:
- If you’re viewing your files and folders under List view in the middle column, hover the mouse pointer over the file or folder name and click the Share button (the upward-pointing arrow icon) that appears toward the right.
- If you’re viewing your files and folders under Grid view, hover the mouse pointer over the file or folder name, click the three-dot icon that appears, and from the menu that opens, select Share.
- If you want to share a folder that you’ve already opened in the middle column, click the Share button that’s toward the upper-right corner. (If the details pane for this folder is open on the right side of the screen, the Share button appears at the top of the pane.)
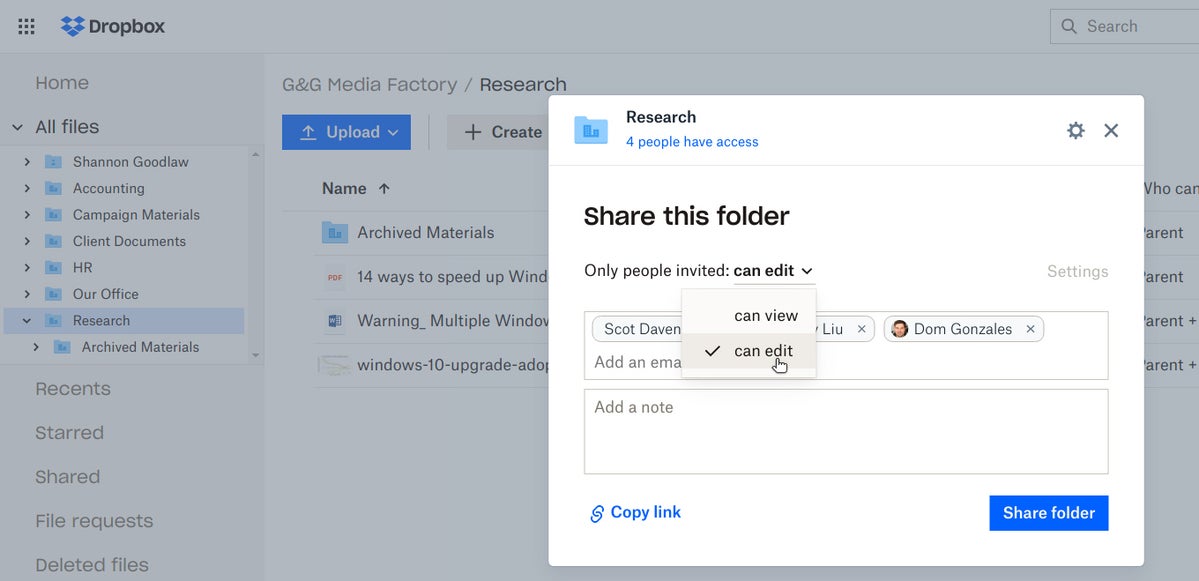
The “Share this folder” or “Share this file” panel is opened. Inside the “Add an email or name” box, type in the email addresses or names of people in your Dropbox contacts who you want to share this file or folder with.
 IDG
IDGWhen you share a file or folder, you grant invitees view or edit permissions. (Click image to enlarge it.)
Above your recipients is a drop-down menu that defaults to “can edit.” If you are sharing a file, “can edit” means that the people you are sharing the file with can edit, download, delete, or comment on the file, or add a copy of it to their own Dropbox account. If you’re sharing a folder, the same permissions apply to all the files that are in the folder, and people you share the folder with can also upload files to it.
If you click the downward-pointing arrow to the right of “can edit,” you can change the permissions to “can view.” This means that the people you’re sharing with can only view, download, or add comments to the shared file or any file in a shared folder; they can’t edit or delete files, nor can they upload new files to the folder. (Certain files, such as images and PDFs, can only be shared as “can view.”)
Inside the box with the words “Add a note,” you can optionally type a message to your recipients.
When you’re finished, click Share file or Share folder on the lower right of the share panel. Your recipients will receive an email that contains a link; clicking it grants them access to your file or folder, and they’ll be prompted to add your file or folder to their Dropbox.
Note: Recipients must have a Dropbox account to access your shared file or folder. If they don’t have one, Dropbox guides them through signing up for at least a free plan. If they’re already a Dropbox user, they also get a notification through their Dropbox account that you want to share with them your file or folder.
If you’re creating a new folder and want to share it, you can save time by doing both actions at the same time. In the left navigation column, click All files. Then click the Create button that’s toward the top of the middle column. From the menu that opens, click Shared folder.
Or, in the left column, click Shared. This will take you to a page showing you any files or folders that you are sharing with other people, or files or folders that are being shared with you. In the right column, click the Create shared folder button.
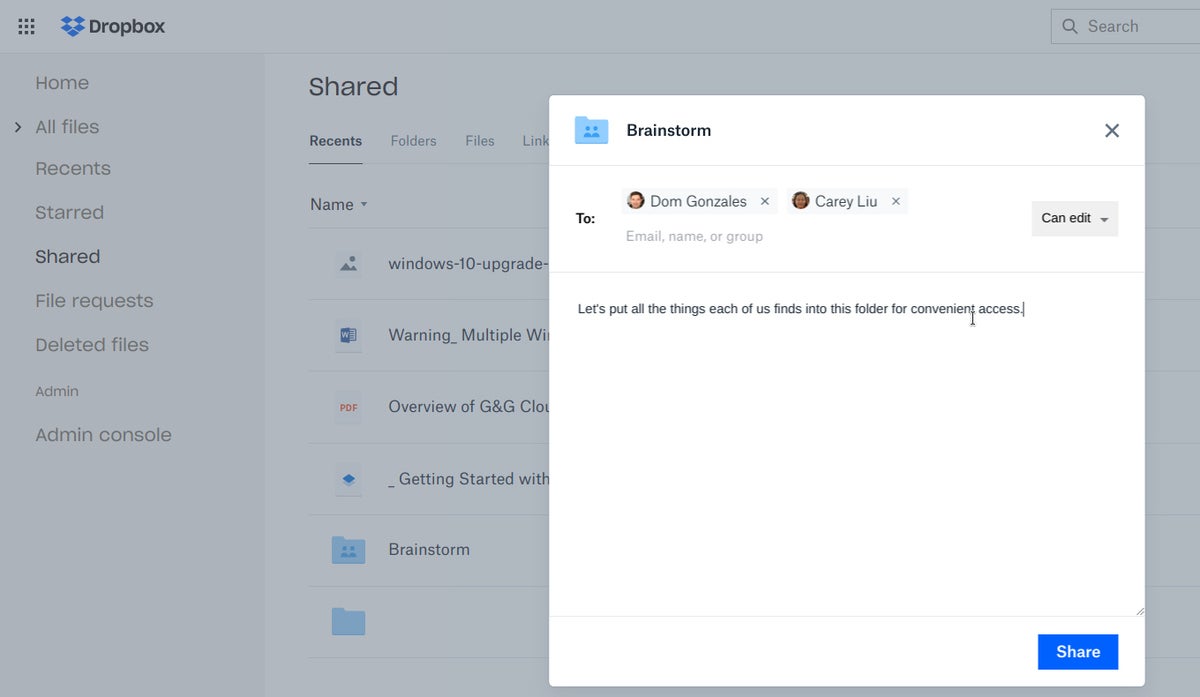
Either way, a panel will appear with two options. Choose the first: I’d like to create and share a new folder and then click the Next button. This will then take you to a panel that’s similar to the aforementioned share panel. First, type in a name for your new folder, then add people who you want to share it with, choose their edit or view permissions, and so on. Click the Share button when you’re done.
 IDG
IDGInstead of sharing an existing folder, you can create a new shared folder from scratch. (Click image to enlarge it.)
Click All files or Shared in the left navigation column to view your folders and files in the middle column. Click the shared folder that you want to collaborate with others on to open it.
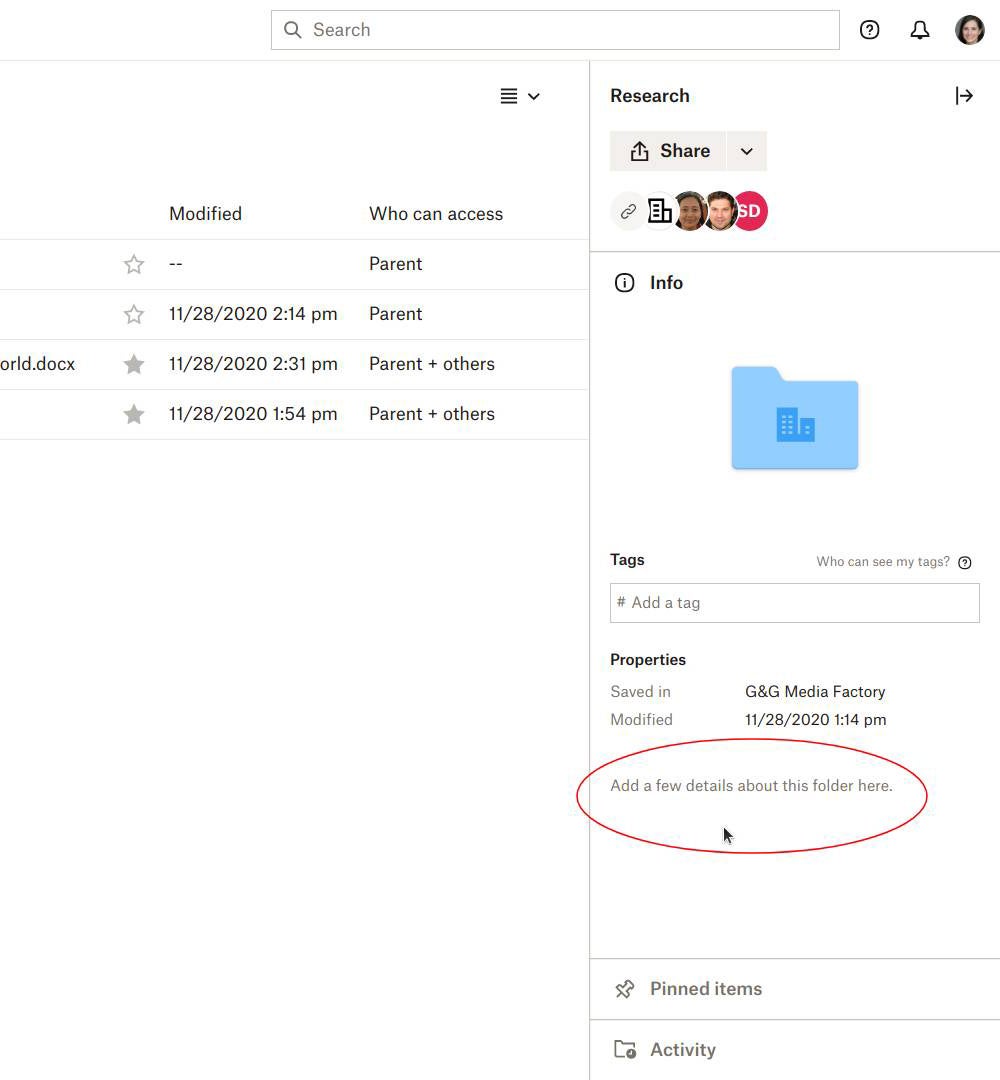
On the details pane in the right column, near the bottom of the “Info” section, click on the words Add a few details about this folder here. Then type in a short description for this shared folder. (If the details pane isn’t already open on the right side, click the icon of the left-pointing arrow in the upper-right corner to slide it open.)
 IDG
IDGYou can enter a description for a folder in its details pane. (Click image to enlarge it.)
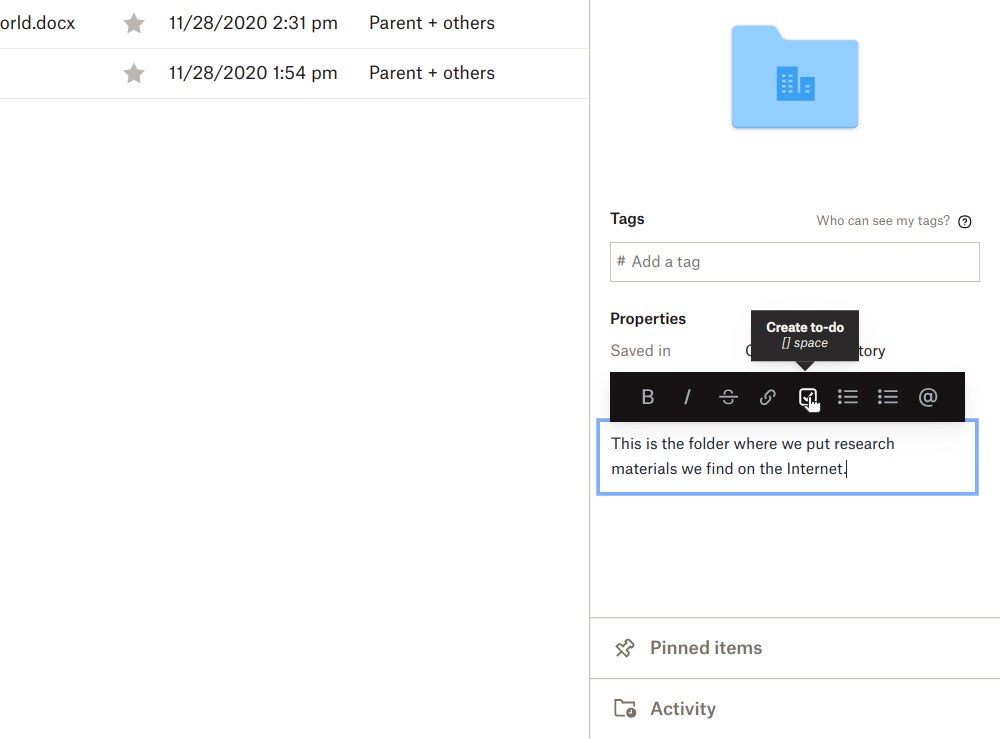
As you type in the description, a toolbar above it offers text formatting options (bold, italic, bulleted lists, etc.), plus three noteworthy functions:
- Create link: This chain link icon lets you enter a web link into the description.
- Create to-do: The checkbox icon starts a to-do list; each line of text becomes a task with a checkbox next to it. When you (or another person with permission to edit this shared folder) click a checkbox, the line of text next to it is crossed out with a strikethrough.
 IDG
IDGYou can add to-do tasks to a folder’s description area. (Click image to enlarge it.)
- Mention someone: Clicking the @ icon lets you insert the email address or name of someone in your Dropbox contacts. You can also type @ inside the description box to evoke this feature. This person is notified by email and notification in their Dropbox account that they’ve been tagged in this folder. (When you tag someone whom you haven’t already shared a folder with, you’re asked if you want to share this folder with them. If you do, you’re then taken to the share panel to add them.)
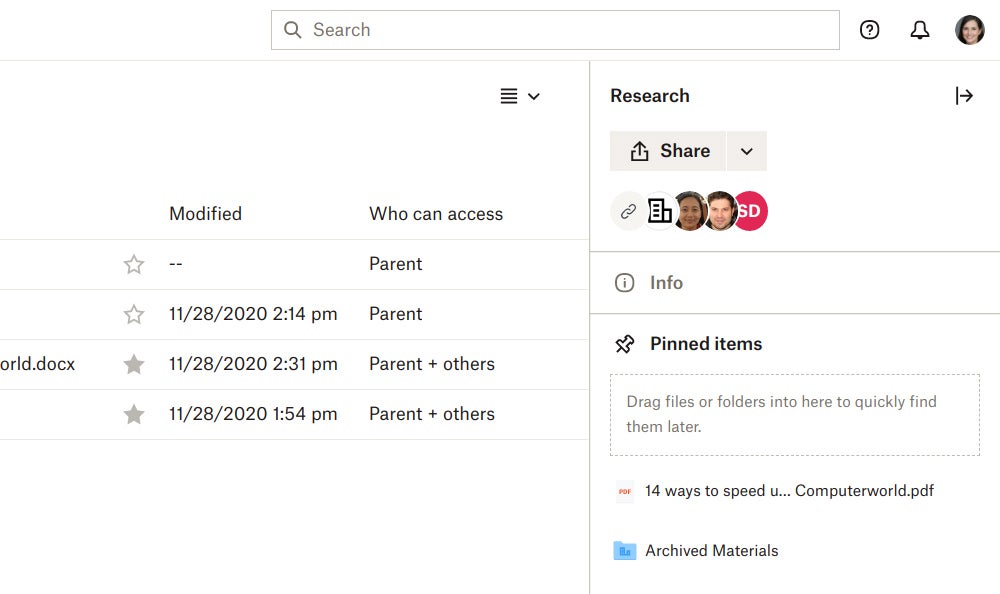
You can also “pin” a file or another folder as an icon shortcut on the details pane of the folder. Click Pinned items on the details pane, and drag one or more files or folders from the middle column to the area marked “Drag files or folders into here to quickly find them later” in order to pin them.
 IDG
IDGPinning a file or folder in the shared folder’s details pane keeps it handy. (Click image to enlarge it.)
To unpin a file or folder from the “Pinned items” section, hover the mouse cursor over the pinned item and click the X that appears to the right of its name.
 IDG
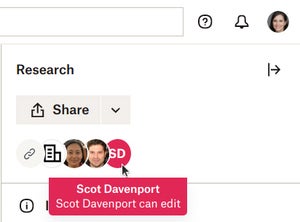
IDGLook in the right column of an open folder to see who it’s shared with.
When you open a shared folder or click the checkbox to the left of a shared file to highlight the file, circle icons toward the upper right show the headshots or initials of the people it’s being shared with. (If the details pane is open, these icons appear at the top of this pane.) Hover the mouse pointer over one of these icons, and a callout shows if the person’s access to the folder or file is “can edit” or “can view.”
Whenever you want to add more people to a shared file or folder: Bring up the file or folder’s share panel as described above, add the new people, assign edit or view permissions for them, and click the Share button.
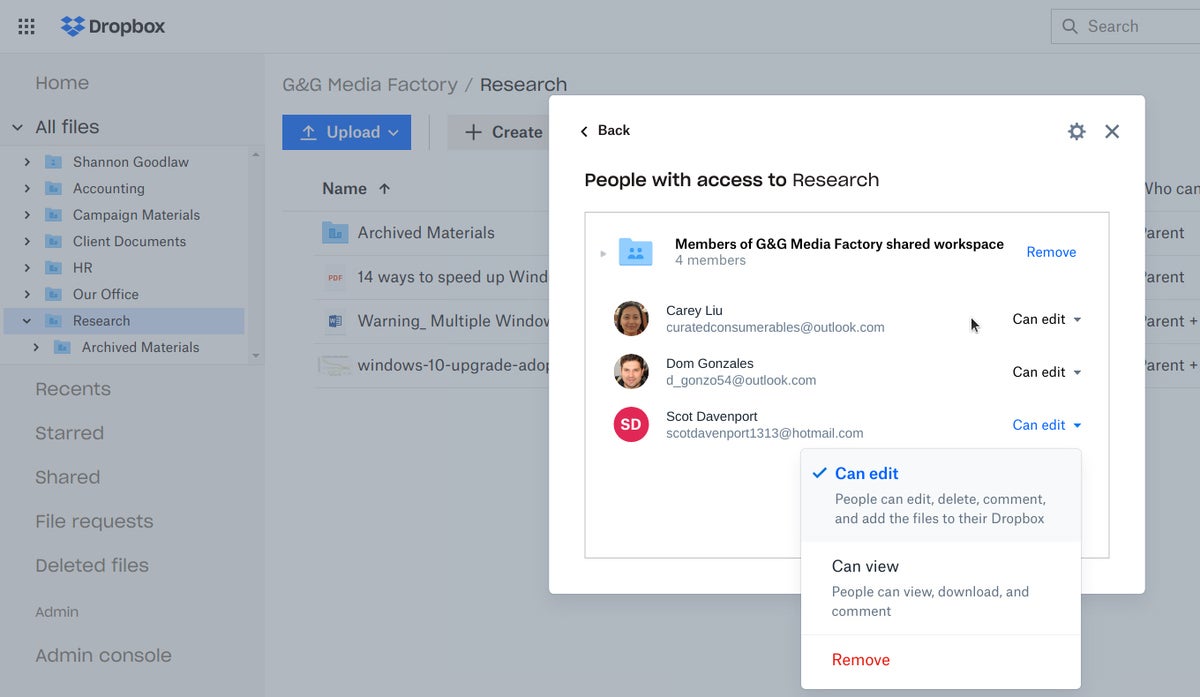
You can also change the permissions for anyone who you’re currently sharing your file or folder with. Toward the top of the share panel, below the name of your file or folder, click “[Number] people have access.”
This switches to a panel listing all the people you’ve shared this file or folder with. Click Can edit or Can view to the right of a person’s name to bring up a menu that lets you change their permissions to view or edit, or remove their access to this file or folder. With a shared folder, there’s an additional option on this panel: You can assign one of these people to take over from you as the new owner of the folder. If you do this, then only they will be able to change this folder’s settings or to unshare it.
 IDG
IDGThe share panel for a folder lets you manage users’ access privileges individually. (Click image to enlarge it.)
If you click the gear icon toward the top right of the share panel for a folder, a settings panel opens that lets you control whether all people with edit permissions can add new people to your folder, or if only you (the owner) can do this action. There’s also a “Viewer info” switch; leave it on to let people with edit access to the folder to see who is viewing files in the folder, or turn it off if you don’t want other editors to know who’s viewing files. If you want to stop sharing the folder, click Unshare folder at the bottom left. Click Save on the lower right when you’re finished making any changes on the settings panel.
When you click the gear icon of the share panel for a file, you’ll see a similar settings panel with the same “Viewer info” switch and “Unshare file” link as described above. Users with paid accounts have access to additional settings such as requiring a password, setting an expiration date, and disabling downloads for the file.
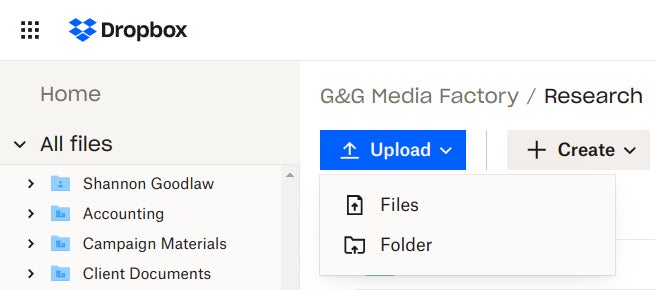
In the left navigation column, click All files or Shared. Then in the middle column, open the shared folder that you’d like to add files or folders to by clicking it. Toward the top of the page, click the Upload button, and from the menu that opens, choose Files or Folder. A file manager tool then opens. It lets you browse through the files or folders on your PC and select the ones you want to upload to your shared folder.
 IDG
IDGThose with edit permissions for a folder can upload files and folders to the folder.
To create a new folder inside a shared folder, click the Create button (to the right of the Upload button), and select Folder. On the panel that opens, type inside the box with the text “Folder name” to provide a name for this new folder. Then click Create on the lower right of the panel.
Remember: This new folder will reside under a shared folder. This means that the people you’ve already given access to the shared folder will also be able to access this new folder that you created inside it. So if you’ve given them “can edit” access to your shared folder, they’ll also have “can edit” access to this new folder.
The Create button also lets you create documents in Microsoft Word, Excel, and PowerPoint; Google Docs, Sheets, and Slides; or Dropbox Paper formats in the shared folder.
View files or edit a document
When you click the file name of a viewable file that’s in your Dropbox (such as an Excel spreadsheet, image, PDF, video, or Word document), Dropbox will switch to a page that lets you preview it. For example, if it’s a PDF, you’ll be able to read and scroll through it. If it’s a video file, it can be played on this page.
If you’ve granted someone edit permissions to an editable file of yours (such as a Microsoft Office document), here’s how they, and you, can interact with this file through Dropbox in a web browser:
Click the document’s filename to open it in the abovementioned preview page. Then click the Open button at the top left of the screen. A drop-down menu opens that lets you choose how to open the document: A .docx file can be opened in Word for the web or Google Docs; a .pptx file can be opened in PowerPoint for the web or Google Slides; a .xlsx file can be opened in Excel for the web or Google Sheets.
 IDG
IDGYou can open and edit .docx files in Word Online or Google Docs. (Click image to enlarge it.)
Make a selection from the two options that you’re presented with. You may need to sign in to your Microsoft or Google account and grant it access to Dropbox. Then the document opens in your browser and you can edit it. Any changes you make will be saved to the original document file stored in your Dropbox. The same will be true for anyone who has edit permissions to the document if they make changes to it.
Next page: Commenting on documents, requesting files, and more →


![[2023] 6 façons de copier / coller du texte brut sans formatage](https://media.techtribune.net/uploads/2021/03/5-Ways-to-Copy-Paste-Plain-Text-Without-Formatting-on-Your-Computer-shutterstock-website-238x178.jpg)


